
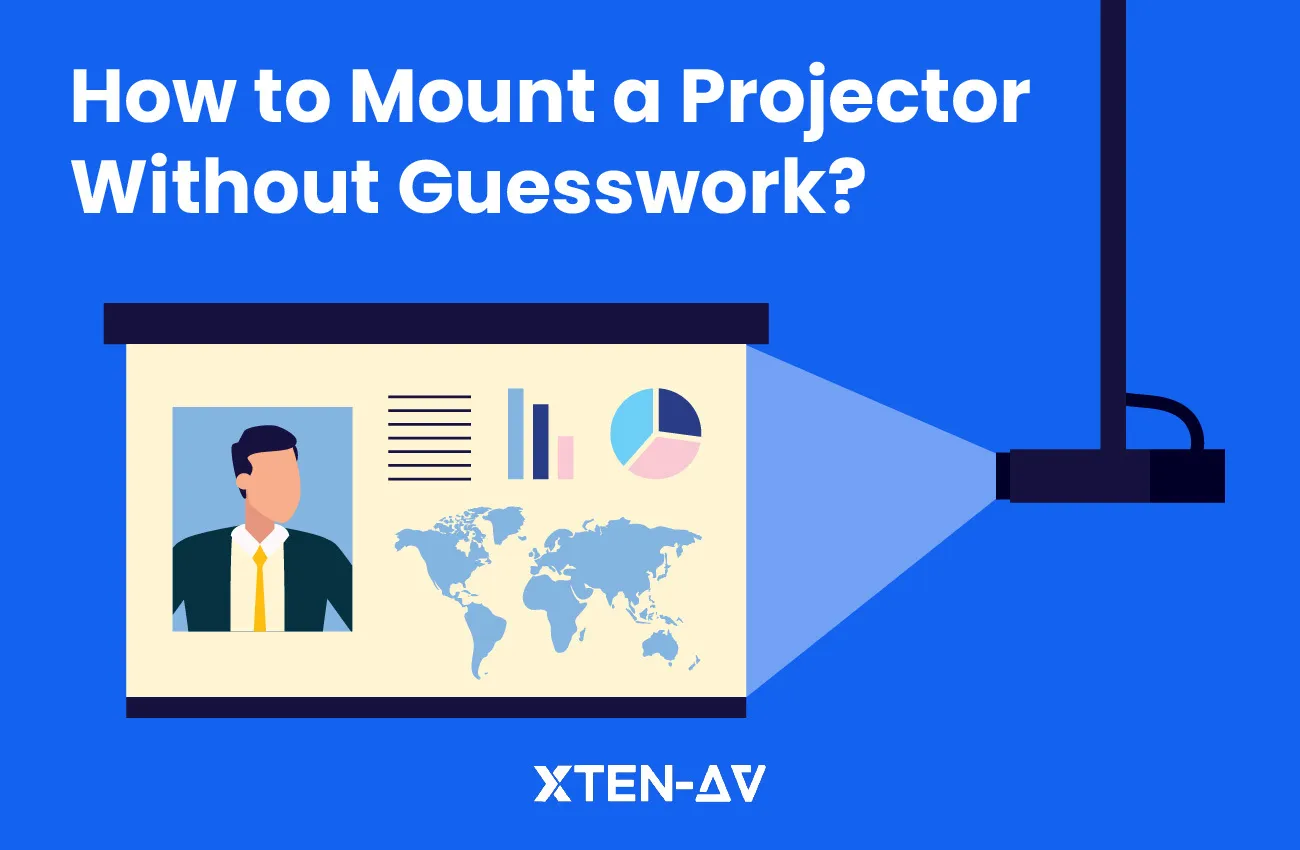

As an AV integrator, you know that mounting a projector on the ceiling is not as straightforward as it seems. And doing so with guesswork is a fool’s path. It leads to misaligned and blurry images, costly reworks, and unsatisfied clients.
Hence, a projector ceiling mount without any guesswork is a must. Now the question arises, how is it possible? To answer this, we bring you a comprehensive blog on “How to Mount a projector without guesswork”.
This projector setup guide covers benefits, mount types, tools & materials needed, step-by-step installation, and more. Additionally, the guide explains how XTEN-AV, trusted by 20,000+ AV designers, helps you do it.
Read on to learn all about the confident projector ceiling mount, which can save time and prevent any hidden surprises.
The all-in-one solution for your Security System Design & Installation needs
Transform your audio-visual experience with XTEN-AV.
No Credit Card required
Key Takeaways:
- Projector Ceiling Mount is essential as it improves the performance of projector, enhances the aesthetics of the room and ensures a better viewing experience.
- The different types of projector mounts are: ceiling mount, wall mounts, projector lifts, tabletop mounts, and portable mounts. But, these mount types on the type of ceiling, such as drywall ceiling, concrete ceiling, and drop ceiling.
- To install a projector ceiling mount calculate the dimensions, locate the structural support, and confirm the height and other position aspects. Then, attach the ceiling plate using lag bolts and fastening the projector to the bracket carefully.
- The difference between considerations for residential and commercial ceiling mount projector are on the basis of type of ceiling, method of installation, tools used and compliances.
- To ensure the best projector ceiling mount for optimal performance and immersive viewing experience, you must ensure AI-powered automated AV software like XTEN-AV.
Why must you Ceiling-Mount a Projector?
Mounting a projector on the ceiling offers several advantages that improve both performance and aesthetics. It saves floor space and provides a clean and professional look. It also maintains an unobstructed view for everyone in the room.
With a projector ceiling mount, you can avoid movement. This reduces the damage risks from pets or children. A stable ceiling mount also helps maintain perfect alignment. As a result, you spend less time on re-adjustments during presentations or movie nights.
From an image-quality standpoint, ceiling mounting provides better control over projection angle. This is because it uses lens shift or vertical offset adjustments. This positioning ensures your image stays in the center of the screen. It also frees the image from keystone distortion.
As a result, the projected image has sharper focus and accurate geometry. And it comprises consistent brightness across the display area, ensuring an immersive viewing experience.
However, ceiling mounting isn’t always ideal. In rooms with fragile ceilings or temporary setups, consider a tabletop projector. You can also place an ultra-short-throw unit on a cabinet for easier portability.
To sum up, you must always choose as per structure and purpose to balance flexibility and stability.
What are the different Types of Projector Mounts and Ceiling Installations?
Different types of projector mounts are ceiling mounts, wall mounts, projector lifts, tabletop mounts, and portable mounts. On the other hand, various types of ceiling installations include drywall ceiling, concrete ceiling, and drop ceiling.
Projector mounts secure projectors in conference rooms, home theaters, and classrooms. Moreover, they help install projectors such as laser projectors and lamp projectors at the ideal angle. Thus, you must choose the mount type that best fits your space.
A proper mount keeps the projector steady and adjustable. It reduces image distortion and ensures a more transparent and consistent picture quality. Hence, you must choose the correct mount type before you measure, as the wrong bracket wastes time and risks rework.
Ceiling-mounted brackets come in fixed, tilt, and extendable designs. They work well for most home and office projectors, giving a tidy, low-profile install.
But, above-ceiling mounts hide gear above a drop grid. They suit heavier projectors or client-facing spaces where aesthetics matter.
Wall mounts and tabletop options are fit for temporary setups or low ceilings. But portable mounts and motorized projector lifts suit events and tall rooms.
You must also check your ceiling material carefully before you drill. For drywall ceilings, use a stud finder to locate ceiling joists and secure the plate with lag bolts into wood. You can also ensure the plate is secured with heavy-duty toggle anchors when joists aren’t available.
The drop ceiling (T-bar) needs a certified drop-ceiling adapter or reinforced grid. It allows the setup to carry the load safely. Concrete slabs need proper masonry anchors or installation from a licensed installer. As a result, just improving won’t work.
You must remember to always size the mount above the projector’s weight and factor in a safety margin. You must verify the VESA hole pattern, torque specs, and anchor ratings against the projector and mount manuals. If any spec is unclear, consult the manufacturer or a structural pro to avoid failures.
Additionally, you must write the chosen mount, anchor type, and cable path in your project file. It ensures proper documentation for reference during future maintenance and compliance.
How to Install Projector Ceiling Mount: Step-by-Step Guide
A methodical Projector Ceiling Mount installation involves calculation, locating the structural support, and confirming the height and other position aspects. These steps are followed by attaching the ceiling plate using lag bolts and then fastening the projector to the bracket carefully.
A step-by-step approach saves time, reduces callbacks, and protects your reputation. When you follow these steps, you deliver a precise, serviceable ceiling mount. This mounting meets client expectations and stands up to maintenance and code requirements.
Mounting a projector to the ceiling without guesswork needs precise planning and measurements. First, you must calculate the projector throw distance using the projector’s specs or a projector throw distance calculator. You can also determine the right screen for your projector using the screen-size calculator.
Then, multiply the screen width by the projector’s throw ratio. The result will be the lens-to-screen distance. Next, factor in vertical offset or lens shift and mark the exact lens point on the ceiling. This math prevents mis-sized images and saves time during alignment.
After marking the ceiling, locate structural support with a stud finder. You must anchor the ceiling plate into a joist whenever possible. If the joist does not align with your mark, you can shift the projector laterally using horizontal lens shift. You can also choose a mounting plate that spans across joists. For drop ceilings, you must plan an approved adapter or reinforce the grid before you install anything.
Before commencing drilling, confirm the ultimate height. Check that the projector is higher than the other fixtures. This gives easy access for maintenance of the lamp or filter. Make sure the light stays within the projector’s offset range. It will help you avoid the need for heavy distortion correction. In the case of office places, verify heights and service rules first, and then continue afterwards.
Attach the ceiling plate using lag bolts into solid timber or concrete anchors for slabs. Use heavy-duty toggles only where joists are absent and the anchors are capable of bearing the load. Set the plate level precisely; a slight tilt causes significant image misalignment. If you use an extension column, assemble it per the manufacturer’s instructions. You must also leave headroom for final leveling.
Fasten the projector to the bracket carefully. Align the projector’s VESA holes with the mount’s adjustable arms. Once done, insert the correct screws and washers. Before finalizing the AV installation, turn on the projector. You must also check lens orientation towards the screen centerline. Use the mount’s tilt and pan to square the image before final torquing.
Route power and signal cables cleanly. Run power to a ceiling outlet or use surface conduit. Until you can install a permanent outlet by a licensed electrician, it is a good temporary solution. For signal connections, run HDMI, HDBaseT, or Ethernet back to the AV rack through conduit or ceiling voids. Optimize cable management with clips, maintain safe bend radii, and label both ends for future service.
Power up the projector and confirm that startup screens or logos appear. Use lens shift and optical zoom to place the image approximately within the screen borders. Avoid heavy digital keystone correction; it degrades picture quality. Display a test grid, then fine-tune tilt, roll, and pan until lines are square and edges parallel.
Focus and brightness come next. Adjust focus and zoom so the image fills the screen with uniform sharpness. Check color and brightness consistency across the surface. If you find uneven brightness, re-check projector alignment and lamp status.
Finish by tightening all fasteners and securing cables with strain relief. Re-run the test pattern, then play representative content to confirm real-world performance. Walk the room to confirm remote control responsiveness and sightlines. It will help you determine typical seating positions. Note any heat, vibration, or cooling restrictions.
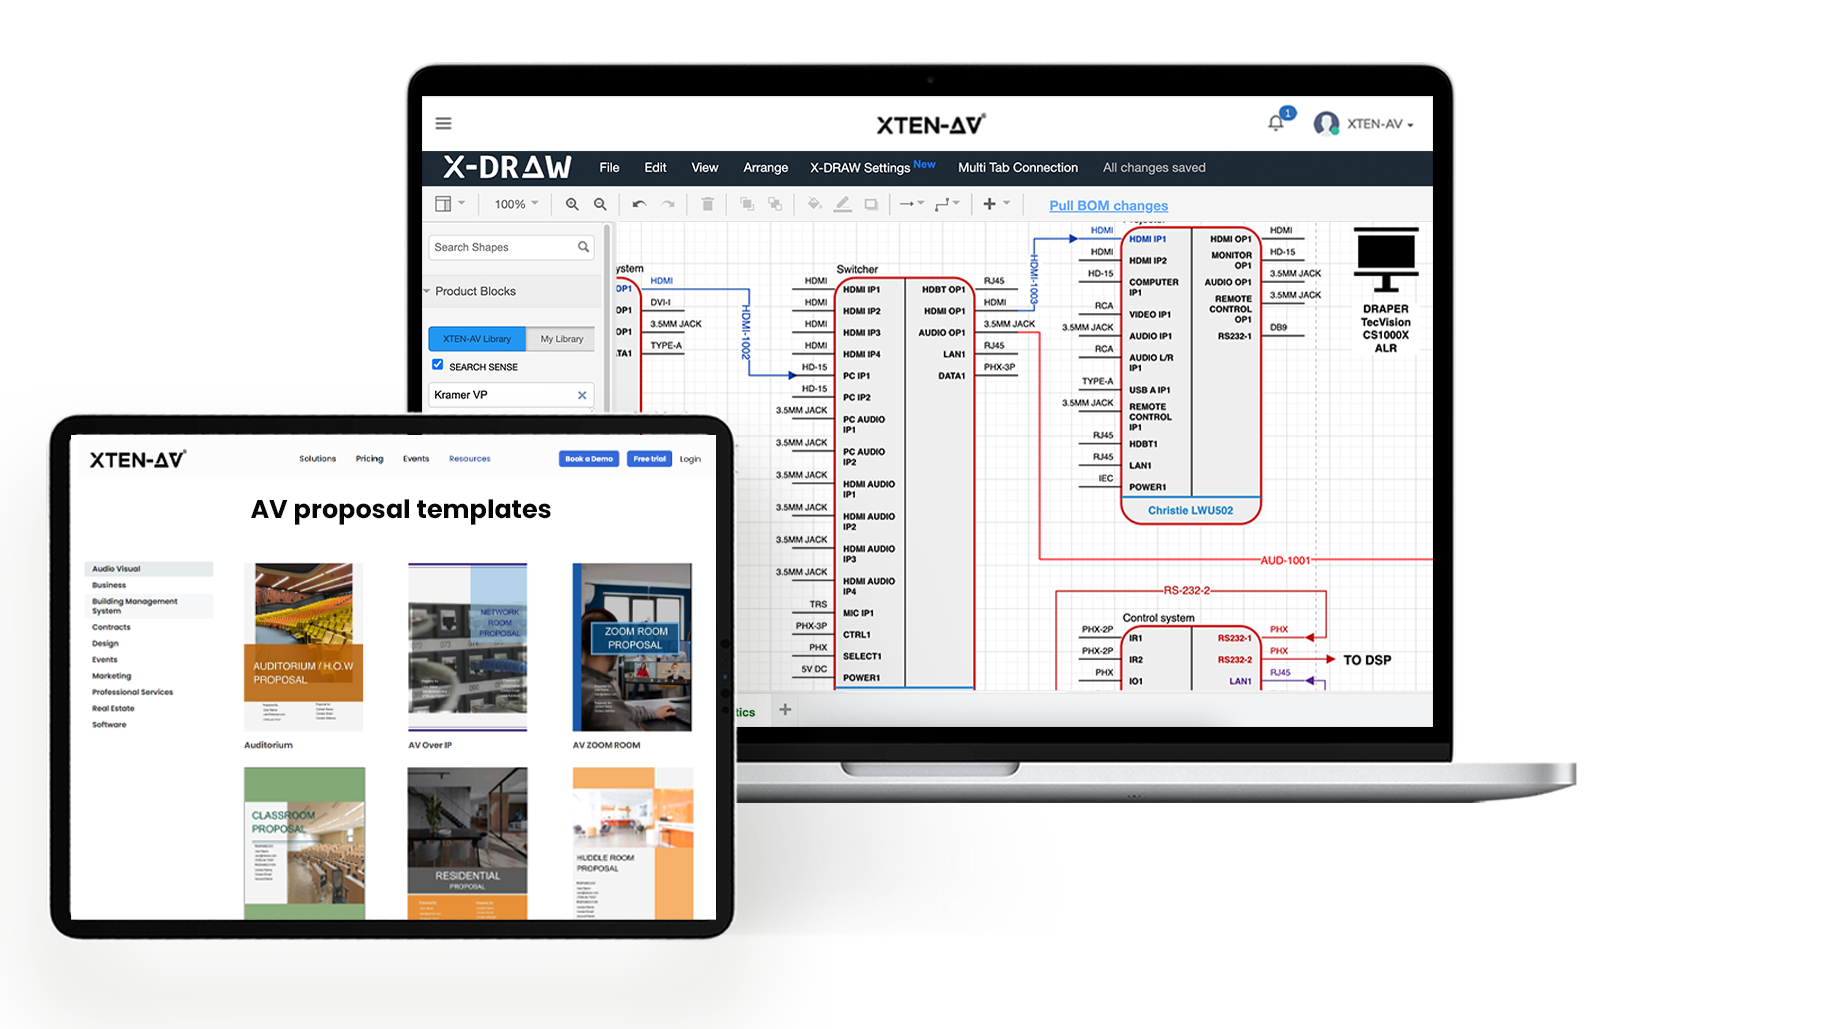
Document the installation details in your project file. It includes noting the throw distance and lens shift values. Also, write down the mount type, anchor specifications, and cable routes. Upload photos and measurements to your design tool, like XTEN-AV’s X-DRAW. It will help you replicate or service the installation later without guesswork.
What are the differences between Residential and Commercial Considerations for the projector ceiling mount?
The differences between the residential and commercial considerations are in the projector ceiling mount, aesthetics, and the severity of compliance. Moreover, AV projectors have to deal with only one type of ceiling in residential projectors.
But, for projector ceiling mount in commercial settings, AV integrators have to manage the projector mount as per the ceiling type, and better and detailed calibration. AV installers also have to create detailed diagrams and schematics of every part & aspect while ensuring every component meets AVIXA and local guidelines.
With that said, let’s dive deeper into the differences between Residential and Commercial Considerations for the projector ceiling mount.
Residential Install:
In a residential project, you’ve to deal with flat drywall ceilings, fewer cables, and nearby outlets. You should focus on aesthetics and conceal wiring with molding or raceways for a clean look. Choose mounts that match the decor. And you must allow easy lamp access for lamp-type projectors.
Safety remains important. So, you must keep projectors out of reach of children and pets. Codes are often less strict for homes. But you should still follow basic standards and manufacturer guidance to avoid liability.
Commercial/Enterprise Install:
In commercial installation, like classroom/boardroom AV, you often mount projectors into drop ceilings, high plenum spaces, or concrete slabs. You may need drop-ceiling adapters, motorized lifts, or reinforced supports for heavy units. Many projectors need coordinated alignment, network control, and consistent calibration across rooms.
Always follow building codes. It means you’ve to use UL-listed mounts and seismic straps where required. Also, you’d have to hire licensed electricians for power drops. Route all signal and power cabling back to the AV rack and label every termination.
Document the install with diagrams and a BOM; tools like XTEN-AV make this fast and audit-ready. For classrooms, use T-bar adapters; for theaters, prefer joist-mounted brackets. Plan for future service access and log measurements. It will allow your team to install without guesswork and reduce callbacks over time.
Common Mistakes and Troubleshooting During Projector Ceiling Mount
Noting common mistakes during the projector ceiling mount helps you avoid them. It also enables you to provide a successful project delivery to the client.
- Incorrect Throw or Offset:
Mounting the projector at the incorrect distance leads to the wrong image size. Thus, you must double-check throw distance and lens shift specs. And you should re-measure screen width and adjust placement accordingly.
- Weak Mount Anchoring:
Never use a drywall anchor alone. Instead, you can locate a joist or use rated anchors. Then you can verify anchor load ratings and re-check torque after settling. It will help prevent pullout or failure immediately.
- Cable Issues:
Measure and test cable lengths before installation. You can choose in-wall or plenum-rated cable. You must also maintain bend radius, label both ends, and secure runs. It will help you avoid strain or signal loss altogether.
- Image Misalignment:
If the picture is tilted or off-center, re-level the mount and adjust pan and tilt. You should also reduce digital keystone correction. It is because heavy correction reduces image fidelity and resolution.
- Power Problems:
Always use a dedicated outlet or PDU and test voltage stability before commissioning. You must also protect gear with surge suppression or UPS. Additionally, you should avoid extension cords and verify proper grounding every time.
- Service Access:
You must always plan for lamp or filter replacement by ensuring ladder access or a lift. And you must leave clearance around the mount and document service steps. It will provide safe and repeatable maintenance procedures now.
Best Practices for Mounting a Projector
Follow the best practices mentioned below to record measurements. These practices will help you choose quality mounts, plan adjustability, and manage cables. And you can also ensure safe, code-compliant installations.
Record mount coordinates, throw distance, and lens shift. You must also note down anchor specs and cable paths in your project file. The documentation will help you replicate placements accurately.
Additionally, this documentation helps you reduce callbacks and simplify future maintenance and documentation.
Record the projector’s final position, screen distance, mount model, and anchor details. It helps you streamline maintenance and replicate installs. It also provides clear handoffs to facilities teams and project audits.
Invest in branded mounts, certified anchors, and high-quality HDMI or HDBaseT cables. It helps you avoid signal loss, premature failure, and warranty voids. Quality hardware reduces downtime and improves client satisfaction.
Choose adjustable mounts with tilt, swivel, and extension features. These features help you reconfigure rooms without reinstalling. The flexibility saves labor hours when seating. And screen positions change across client projects frequently.
Avoid mounting over lights, fans, or HVAC vents that obstruct the beam or cause shadows. Survey the ceiling plan and coordinate with MEP teams before drilling holes.
Hold the projector at the planned position using a helper, power it on, and preview the image. It helps you confirm throw, focus, and sightlines before committing to permanent fasteners.
Bundle excess cable neatly in ceiling plenums or raceways. It helps you label both ends, use Velcro ties for adjustability, and maintain bend radius. These methods prevent signal loss and ease the service.
Wear safety goggles and gloves, secure ladders, and ensure you use a second person for heavy lifts. You must follow lockout procedures for nearby electrical work. This helps keep crews safe always.
How XTEN-AV Helps with Projector Mounting?
You can remove guesswork by using XTEN-AV for projector mounting. Use X-DRAW to map room geometry and calculate throw distance using the throw distance calculator. You can also use X-DRAW to verify lens shift and maintenance clearances.
The early validation reduces rework and protects equipment. It also ensures consistent installation standards outcomes across residential and enterprise deployments every time.
You can use X-DRAW to diagram rooms, place projectors, and model screen geometry. X-DRAW offers industry-standard precision and AI-powered automation. It auto-calculates throw distances and documents lens shift limits and mount coordinates.
You export scaled floor plans and installation drawings that installers can trust. It helps you remove ambiguity and speed field validation during setup tasks.
You can access XTEN-AV’s product library, comprising 1.5 million+ products. It helps you select precise projector and mount models as per specs and VESA patterns. Use the built-in throw-distance calculator, project brightness calculator, and ceiling speaker layout calculator. They will help you set up an optimal screen and exact lens placement.
The throw calculator reduces measurement errors and prevents incompatible purchases. It also integrates selected items directly into procurement lists for efficient ordering now.
Another benefit of using XTEN-AV is X-DOC. With X-DOC, you compile accurate bills of materials and labor estimates. It also creates vendor links for mounts, plates, anchors, and cable runs.
You can generate install sheets and procurement packs. These aspects specify torque values, anchor types, and cable lengths. This centralization cuts missing-part delays. It also simplifies invoicing and streamlines pre-site procurement and approval cycles.
XTEN-AV also allows you to invite all stakeholders into a shared project with its cloud-based storage and access. Designers, integrators, electricians, and clients can review placement, cable routing, and mount specs.
Real-time comments, version history, and approval gates prevent onsite confusion. They also ensure everyone coordinates work before drilling. This results in a time-saving process, which streamlines permits and compliance workflows.
You can apply XTEN-AV templates and checklists to standardize mounting procedures across teams. With XTEN-AV, you can generate projector installation sheets with photos, torque specs, and service notes.
Thus, on-field AV technicians and installers follow the same steps. Standardization raises first-time-right rates, reduces variability, and also hands facilities warranty handover records. XTEN-AV also offers real-time notifications when product specs or standards change. As a result, you remain aware of the changes and can update the mount plans and BOMs quickly.
XTEN-AV’s update engine flags new throw ratios and revised mount compatibility. It also identifies code changes and drawing revisions. Keeping designs current reduces retrofit risk and simplifies compliance audits and stakeholder notifications.

The all-in-one solution for your AV needs
Transform your audio-visual experience with XTEN-AV.
No Credit Card required
Security System Design Mastery + Winning Proposals = 10x Productivity!
- ✔ Automatic Cable Labeling & Styling
- ✔100+ Free Proposal Templates
- ✔ Upload & Create Floor Plans
- ✔1.5M Products from 5200 Brands
- ✔ AI-powered ‘Search Sense'
- ✔Legally Binding Digital Signatures
Conclusion
Safe and measured installation saves time, reduces callbacks, and delivers consistent image quality. And you avoid rework while protecting the equipment when you follow each step to the “T”. This means calculating throw distance, verifying structure, and using the correct anchors.
So, follow the steps and make a mental note of the information mentioned in this guide. It will help you to install, cable, align, and mount each projector precisely.
Also, use XTEN-AV to model placement, generate BOMs, and document settings. This software allows teams to provide efficient, accurate, and desired results without guesswork. It also confirms workflows and cuts onsite surprises immediately. Moreover, it improves client satisfaction across projects.
So, what are you waiting for? Sign up for a 15-day free trial or book a live demo to see XTEN-AV and X-DRAW in action.
FAQ's
Most projectors can be ceiling-mounted if they have mounting holes. They must also have compatible VESA patterns for ceiling mounting. Very small pico models may lack mounts. Check the manual, weight, and hole pattern first.
Use a mount rated above the projector’s weight. You must follow the manufacturer’s instructions for safe, secure installation and proper anchor selection.
Mount height depends on screen size, lens shift, and throw distance. Calculate throw distance using the projector’s throw ratio and screen width. Position the lens at or slightly above the screen’s top edge.
But keep the device within the projector’s vertical offset range. Always confirm maintenance access and clearance for service and ventilation requirements.
You may mount a projector yourself if you’re comfortable with tools, heights, and wiring. But you must hire a professional for high ceilings, complex cable runs, and networked systems. You must also hire AV professionals for structural reinforcement or electrical work.
Professionals reduce risk and ensure code compliance. They also provide documentation for maintenance, warranty support, and testing.
Run cables through ceiling voids, conduit, or in-wall rated raceways. It keeps the cables hidden and code-compliant. Use a small junction box above the projector for power and signal terminations. Secure lines with clips, maintain bend radius, and label both ends. Finish with ceiling plates or molding for a clean look.
Crooked projection images usually mean the projector is not level or is off the screen centerline. Re-check the mount’s leveling, pan, and tilt adjustments. You must also verify that the projector is in the center position horizontally.
Yes, you can mount projectors on drop ceilings. You will have to use certified T-bar adapters or above-grid mounts. It is because they transfer the load to structural supports.
Reinforce the grid when necessary and use above-ceiling anchors where possible. Never rely on tile panels alone. Confirm adapter compatibility with the mount and follow manufacturer and local code requirements.
You’ll need a ladder, drill with bits, screwdrivers, and an adjustable wrench or socket set. You’ll also need Allen keys, a stud finder, a tape measure, and a level. You must also keep a helper, cable testers, and velcro ties.
Additionally, you should place conduit or raceway materials nearby. You must always wear safety gear like goggles and gloves. Keep spare screws, anchors, and mounting bolts handy always.
Yes, projector mounting focuses on beam geometry, throw distance, and ceiling support. But TV mounts focus on wall studs and flat-panel weight distribution. Projectors often hang from ceilings with adjustable columns. However, TVs attach flush to walls.
Explore more by topic

AV Design Mastery + Winning Proposals = 10x Productivity!
- Automatic Cable Labeling & Styling
- 100+ Free Proposal Templates
- Upload & Create Floor Plans
- 1.5M Products from 5200 Brands
- AI-powered ‘Search Sense'
- Legally Binding Digital Signatures
No Credit Card Required
Related Blogs

-

- Posted by Sahil Dhingra
Audio Visual Security Site Survey for System Design & Integration Checklist Sahil...

-
- Posted by Sahil Dhingra
Audio Visual How to Mount a Projector Without Guesswork Vibhav Singh Published...

-
- Posted by Sahil Dhingra
XTEN-AV Black Friday and Cyber Monday Deals in 2025 For Audio Visual...